How to Record Vocals at Home: 8 Steps to Clean Takes
Published
Record vocals at home with a phone, USB mic or interface: room fixes that work, mic distance, gain at −12 dBFS, comping and light processing for beginners.
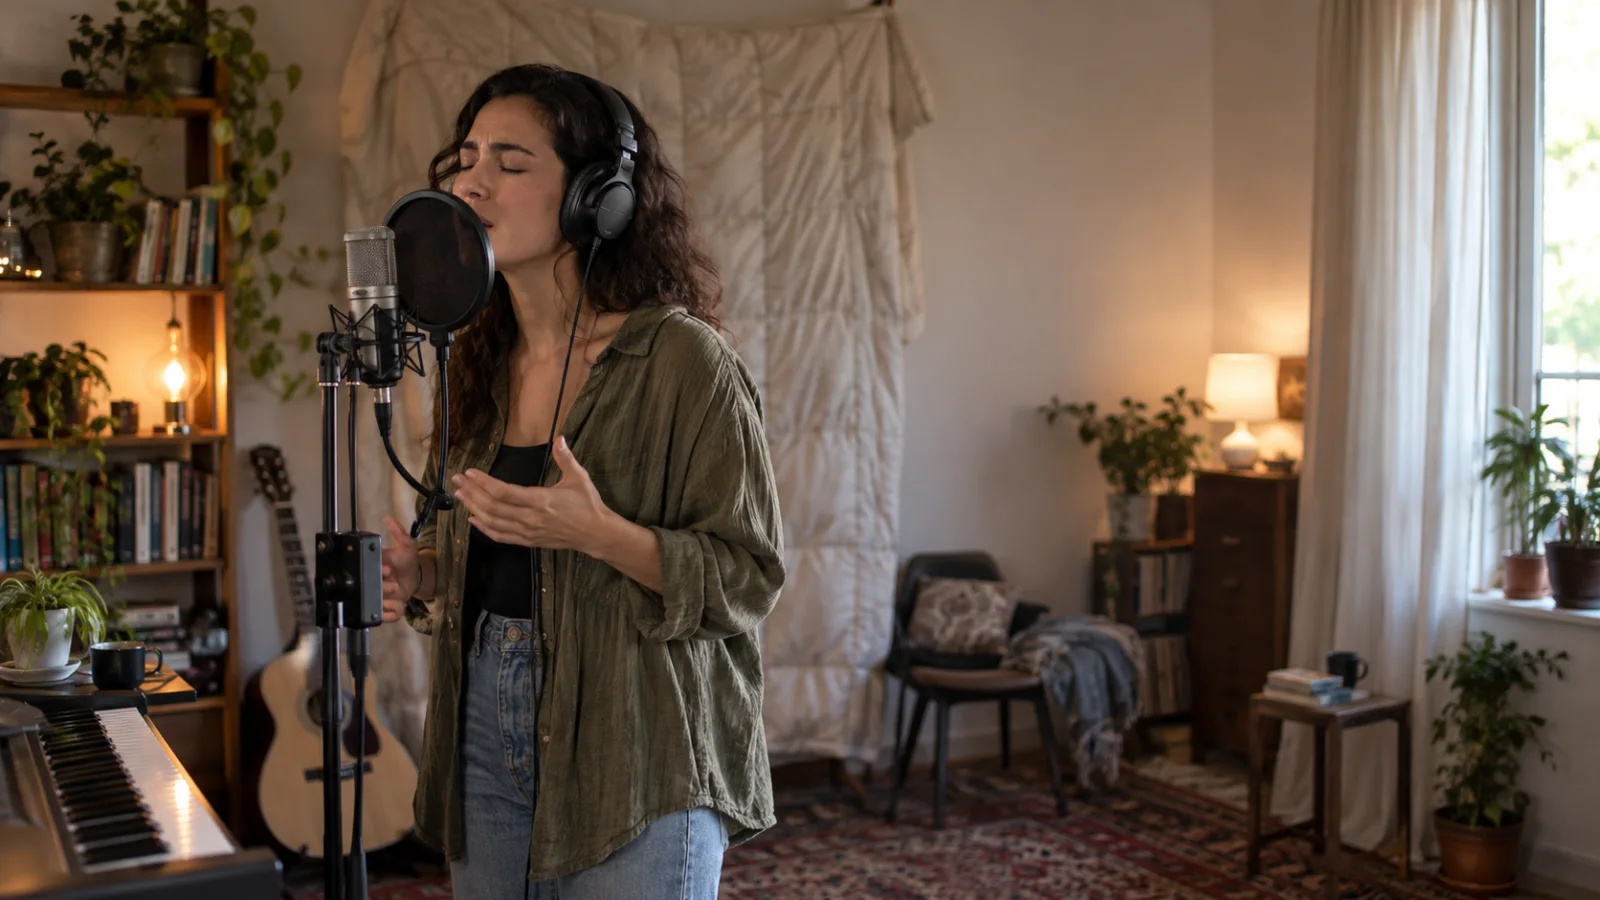
To record good vocals at home, fix the room and your distance to the microphone before you buy anything. These eight steps matter most:
- Room: sing facing an open wardrobe full of clothes, with a duvet hung behind you.
- Distance: 15–20 cm from the mic (a hand span), with a pop filter and the mic slightly off to one side.
- Gain: the loudest line peaks around −12 dBFS and never touches 0.
- Headphones: wired and closed-back, with the backing low enough not to leak.
- Warm-up: five to ten minutes of humming and lip trills.
- Takes: one guide take, then three to five full takes.
- Comping: build one vocal from the best line of each take.
- Light processing: high-pass filter, gentle compression, de-essing and reverb on a send.
Recording on a phone only? The guide to recording a song on your iPhone or Android phone covers the apps. This one is about the voice itself: room, technique, performance and the first clean-up.
Three home vocal setups, from free to about $400
| Setup | What you need | Typical cost | Best for | Limit |
|---|---|---|---|---|
| Phone only | Phone, wired headphones, a stand or a pile of books | $0 if you already own them | Song ideas, guide vocals, writing demos | Little control over level and processing |
| USB microphone | USB mic, computer or phone, closed-back headphones, pop filter | About $100–$200 for the mic | A solo singer who wants clean, simple takes | One microphone at a time |
| Audio interface + XLR mic | One- or two-input interface, microphone, XLR cable, stand, pop filter | About $250–$400 for interface and mic, plus cable and stand | Voice and guitar at once, upgrading one piece at a time | More cables and settings; a condenser needs 48 V phantom power |
These are typical 2026 prices for entry-level gear, based on reference prices from manufacturers’ own stores (see Sources). They vary by country and with sales.
A dynamic microphone picks up less of the room, so it forgives an untreated bedroom. A condenser captures more detail and more room; it pays off once the room is under control. Spend in this order: headphones, room, microphone. The minimalist home studio guide covers what else can wait.
Treat the room with what you already have
The microphone hears your voice plus every reflection that comes back to it. The worst reflections come from the wall behind you, because a standard (cardioid) microphone listens forward, toward you and whatever is behind you. Clap once: a metallic ring or a quick “zing” means the walls bounce sound back and the vocal will sound boxy.
- Wardrobe full of clothes. Face the open wardrobe with the microphone between you and the clothes. Layers of fabric with air between them absorb the mid and high frequencies where boxy reflections live, so your voice goes past the mic and does not come back.
- Duvet or heavy blanket. Hang it behind you, over a door, a clothes rack or two chairs. That is the surface the microphone points at, so a thick, soft layer there removes the reflection it hears most. Folded in two, it absorbs more.
- Full bookshelf. Books of different depths break one reflection into many small ones that return weaker and at different times, instead of as a clear echo. It helps on a side wall but does not replace absorption behind you.
- Reflection filter. The curved shield behind the microphone blocks sound arriving from behind and around the mic. It cannot block the wall behind you, so pair it with the duvet.
Avoid bathrooms, kitchens and empty rooms, however good they sound while you sing: tiles and bare walls add reverb you cannot remove later. Stay out of corners, where bass builds up, and keep an arm’s length from bare walls. Record ten seconds in two positions and compare them on headphones.
For voice and guitar together, see the placement test in the home demo guide.
Mic technique: distance, pops and angle
- Distance: 15–20 cm from your lips, a hand span from thumb to little finger. Closer adds bass (the proximity effect) and pops; farther adds room.
- Pop filter: 5–10 cm in front of the microphone. No filter? Use the pencil trick: fix a pencil vertically across the center of the grille with a rubber band. It splits the jet of air from “p” and “b” before it hits the capsule.
- Angle: aim the microphone at your mouth from slightly above or to one side, roughly 20° off the straight line. Plosives and harsh “s” sounds travel straight forward, so a small angle softens both.
- The front: many studio condensers are side-address, so you sing into the side, not the top. Check the manual.
- Stay in place: stand, mark your spot with tape and keep the lyric at eye level. Cover a bare music stand with a towel: it reflects sound into the mic.
- Work the distance: lean back 5–10 cm on the loudest high notes and move in slightly on soft lines.
Set the gain: peaks around −12 dBFS
Record at 24-bit and 44.1 or 48 kHz, the usual defaults. Sing the loudest line of the song, not the first verse, at full performance level, and turn the gain on the interface or USB mic until the peaks land around −12 dBFS on your app’s meter. That leaves room for the note you did not plan for.
- A quiet 24-bit recording loses nothing you will hear. A clipped one cannot be repaired: record it again.
- Too quiet? Move closer instead of turning the gain up, or you raise the room and the noise too.
- In GarageBand for iPhone with an external microphone, Input Settings has an Automatic switch for the level. Turn it off and set the In slider yourself so the level stays the same between takes.
Headphone mix and latency
Use wired, closed-back headphones. BandLab’s help center puts typical wired latency at about 5–10 ms and Bluetooth at 34 to 300 ms, enough for your voice to land late. A Bluetooth headset’s microphone is worse: the connection can switch to a low-quality hands-free mode and the audio turns muffled.
- Balance: keep the backing a little lower than feels natural, with your voice clear enough to judge pitch. Loud headphones leak into the microphone.
- One ear off: if you cannot hear your pitch, slide one ear cup off and press it against your cheek so it does not spill sound.
- Direct monitoring: most interfaces and many USB mics have a zero-latency headphone output. Use it, and turn off input monitoring in your app so you do not hear yourself twice.
- Buffer size: if you monitor through the software, set the buffer to 64 or 128 samples while recording. Smaller buffers cut latency but need more processing power, so raise it again for mixing.
- A click or backing: record to a tempo so takes line up when you comp. Tap it on the tap-tempo metronome, or sing over a loop from the chord progression player.
Record the performance
Warm up for five to ten minutes
Hum on a comfortable note, do lip trills sliding up and down, sing “ng” sirens, then sing the chorus once at half voice. If the chorus strains, change the key now, not after ten takes: the vocal key finder shows which keys fit your range.
Start with a guide take
Sing the whole song once to check level, headphone mix and lyric. Listen back for room echo, pops and clipping, fix one thing, then start the real takes.
Full takes or punch-ins
- Full takes: three to five complete passes keep the song’s emotional arc and a consistent tone. Use them for the main vocal.
- Punch-ins: re-record one line or word. Start one or two bars early, sing along into the punch so breath and tone match, and keep the same distance and gain. Do it in the same session: your voice changes from day to day.
- Rule of thumb: if a third of the song needs punching in, record another full take.
Comp the best lines
Comping means building one vocal from the best phrases of several takes. Listen line by line, mark the best take on the lyric sheet, then assemble it in your DAW. Cut at breaths or consonants and add a short crossfade, around 5–10 ms, so edits do not click.
Worked example: three takes of the first verse of “Kitchen Light”, an original song at 88 BPM.
| Line | Take 1 | Take 2 | Take 3 | Keep |
|---|---|---|---|---|
| The kettle clicks, the window’s grey | Good tone | Late on “clicks” | Best phrasing | Take 3 |
| Your coat still hangs where it would stay | Flat on “stay” | Best | Breath noise | Take 2 |
| I read the note you left in blue | Best | Pop on “blue” | Fine | Take 1 |
| And every line still points to you | Rushed | Pop on “points” | Best ending | Take 3 |
One decision per line: the comp takes five minutes because the notes were written while you listened.
Keep takes named and together
Name each file by song, part and take: Kitchen Light – lead vocal – take 03 – 2026-09-26.wav. The song file name generator keeps names consistent. Keep the takes, comp notes, lyric, key and BPM in one place, and export the finished comp as WAV.
Light processing after recording
Record dry and process afterwards. That happens in a DAW such as GarageBand (free on Mac, iPhone and iPad) or BandLab (free in the browser and on iOS and Android). Zoundroom is not a DAW: it does not mix, add effects or correct pitch. Work in this order:
- High-pass filter (low cut) at 80–100 Hz. It removes rumble from traffic, footsteps and the stand without touching the voice; around 70 Hz for a very deep voice. In GarageBand for Mac, click the Smart Controls button, then the EQ button, and turn on band 1, the high-pass filter.
- Gentle compression. A ratio of 2:1 to 4:1, with the threshold set so loud phrases lose 3–6 dB, evens out the level. Start with a 10–30 ms attack and a 50–150 ms release. In GarageBand for iPhone, tap Track Controls, then Plug-ins & EQ: the Compressor and Visual EQ are always in the chain.
- De-essing. A de-esser turns down harsh “s” and “t” sounds, usually between 5 and 8 kHz. Two to four decibels is enough; more sounds lispy. No de-esser in your app? Use a narrow EQ cut at the harsh frequency, and angle the mic more next time.
- Reverb on a send. Put one reverb on a send (aux) track, fully wet, and send the vocal to it. A short room or plate with 1–1.5 s of decay and 20–40 ms of pre-delay keeps words clear, and the dry vocal stays untouched. In GarageBand for iPhone, the Reverb Level slider in Track Controls sends the track to the song’s master reverb; tap Master Effects to change the preset. In BandLab, tap the track, open the Effects tab and pick a preset or tap Add Effect.
Pitch correction is optional: fix a few notes, not every note. Export a 24-bit WAV to keep working and an M4A or MP3 to share. The GarageBand demo guide walks through a whole session.
Common problems and fixes
| Problem | What you hear | Fix |
|---|---|---|
| Room echo | A hollow, distant, boxy voice | Move to 15 cm, hang a duvet behind you, face the clothes |
| Plosives | Low thumps on “p” and “b” | Pop filter 5–10 cm from the mic, pencil trick, mic slightly off-axis; the high-pass filter removes the rest |
| Sibilance | Harsh, whistling “s” and “sh” | Angle the mic, de-ess at 5–8 kHz, do not point a bright condenser straight at your mouth |
| Clipping | Crackle or distortion on loud notes | Lower the gain until peaks sit around −12 dBFS, lean back on big notes, re-record the line |
| Background noise | Hum, hiss, fridge, traffic | Switch off fans and the fridge during takes, move the laptop away, record at a quiet hour; a gentle noise gate helps between lines |
| Bluetooth latency | Your voice lands late or sounds muffled | Wired headphones; never record through a Bluetooth headset microphone |
| Headphone bleed | The backing is audible in the vocal | Lower the headphone level, use closed-back headphones |
Where Zoundroom fits: every take, the lyric and your notes in one project
Once you have your takes, Zoundroom keeps them with the song instead of in a downloads folder. Create a project with the song’s working title and import the exported takes and the comp from GarageBand, BandLab or your DAW. Write the lyric in a note and, under each line, the take you kept and why: “Line 2: take 2, take 1 goes flat on stay”. When a new melody or harmony idea comes up while you listen, record it directly in the app, inside the lyric note, and the audio is inserted at the cursor. The same account opens the project and its recordings on iOS, Android and the web. With Pro or Band, a co-writer or vocal coach can leave timestamped comments on a recording, such as “1:12, second chorus: breathe before the last line”. Next step: create the project for the song you are recording, import your best take and write one question under it.
Zoundroom is not a DAW: it does not mix, master, add effects, correct pitch or record multitrack, so keep your DAW for that part. See how recording and importing works.
Frequently asked questions
How can I record vocals at home without a microphone?
Use your phone’s built-in microphone or wired earbuds with an in-line mic. Put the phone 15–20 cm from your mouth on a stand or books, sing into a furnished room or an open wardrobe, and keep the loudest line from distorting. It is enough for ideas and demos; the phone recording guide has the app settings.
What is the best room in the house to record vocals?
Usually the bedroom: a bed, curtains and a wardrobe full of clothes absorb reflections. Face the open wardrobe, hang a duvet behind you and stay away from corners and bare walls. Bathrooms, kitchens and hallways add echo you cannot remove.
Is a USB microphone or an audio interface better for vocals?
A USB microphone is the simplest route for one voice. An interface with an XLR microphone costs more but records voice and guitar at once and lets you upgrade each piece separately. At entry level, the room and your technique change the sound more than this choice.
How do I make vocals sound professional at home?
Get the recording right first: a treated spot, 15–20 cm distance, peaks around −12 dBFS and a warmed-up voice. Then comp the best lines and add only light processing. Compare with a reference song at the same volume; the rest is mixing, a skill of its own.
Sources
All pages checked on September 26, 2026.
- Apple Support, GarageBand User Guide for iPhone: Use the track controls, Use effect plug-ins and Record sounds with the Audio Recorder.
- Apple Support, GarageBand User Guide for Mac: Use the EQ effect and Add and edit effect plug-ins.
- App Store: GarageBand for iPhone and iPad (free) and GarageBand for Mac (free).
- Apple Support, Manage input monitoring latency in Logic Pro for Mac.
- BandLab Help Center: Fixing Bluetooth Distortion and Latency, Supported Platforms and System Requirements and Adding Effects.
- Reference prices for the setup table, from manufacturers’ stores: Audio-Technica AT2020USB-X USB microphone, $169; Focusrite Scarlett Solo (4th Gen) interface, $159.99; Shure SM58 dynamic microphone, €129 recommended retail price.